youtube how to make an end grain cutting board
Step 3 Glue the Strips Together Anthony Tieuli Place the strips on a workbench and divide them into two groups. Video was made using stop motion technique.

Pin On My Recipes
Make the strip thicker 1 mm than at the drawings.

. So lets say we are using 84 2 thick lumber and we want our end grain block to be 12 wide 18 long and 15 thick. Cut the slats When making the cuts to build an end-grain cutting board a square fence on your table saw is a must. Details here instructables 14.
I made this end grain cutting board from hard maple and sipo sipo is an African wood also known as utileAn end grain cutting board is the preference of ch. The thinner strips on the left and right of the photo are there to keep the metal clamps from marring the cutting boards surface and the MDF on the top is clamped down to prevent the board from bowing will clamped. To make an end grain cutting board as durable as possible its best to select a board that is between two and a half inches.
Step 7 True the Edges Plane the Faces. The size of your pieces will affect the size of the pixels for the end grain. Use a damp rag to wipe up any glue that squeezes out.
Clamp the panel and 2xs for about an hour. The seams are the weakest part of a board. Make the thinner end grain strips at the table saw or band saw according to the drawings.
Follow step-by-step instructions for cutting and assembling the parts for a decorative butcher block. Shift each one sideways so that the glue joints in each strip are offset from the ones in the neighboring strips. Take it slow measure 3 times cut once keep your cuts as smooth as possible to minimize loss.
My stack of slats with the grains and colors alternating. Now apply a liberal amount of wood glue rotate the pieces back up again and carefully tighten down the clamps making sure to apply equal pressure. Four-way intersections are particularly weak.
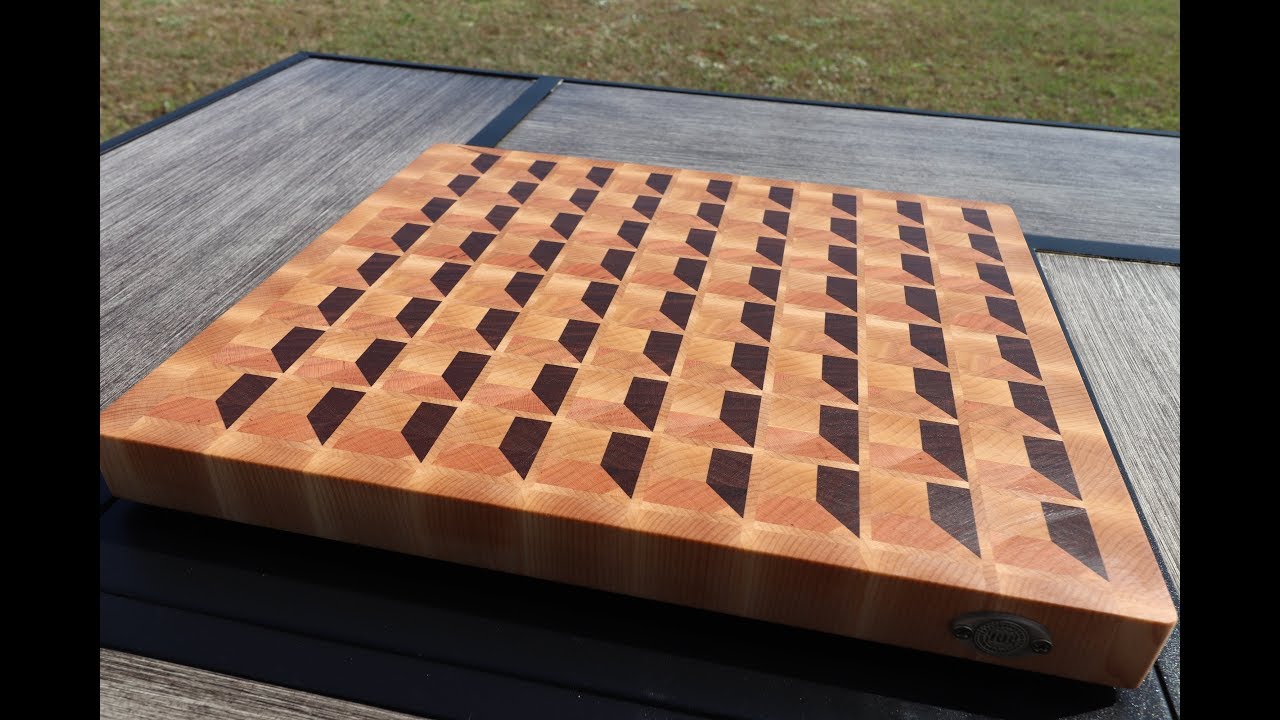
Handmade End Grain Cutting Board. This project shows the steps I took to create a three dimensional end grain cutting board. Then use a table saw to trim the weathered wood from each side and rip the board into strips that are the same thickness on all four sides.
End grain cutting boards are typically made with bricklayers pattern to offset each coarse piece. 3D End Grain Cutting Board In Depth Class. Use a planer to smooth the edges of the board.
For this one I planed the boards down slightly before cutting just to make sure the joints would be completely flush. The number of materials you will use depends solely on your desired size of the board. Glue works best on a smooth surface.
Place all the strips so the end grain faces up. Just grab the hardwood in light and dark tones of wood to make this super simple but enchanting end grain cutting board. The perfect size for everyday use or slicing your favorite cut of meat.
Measures 15 12 x 10 34 x 1 12 thick. Ill show you how to make diamond end grain cutting board designs that are unique and use the grain of the wood to make a statement. These are butcher.
Laying Out Your Board and Cutting Everything to Length Now that you have clean boards that are the desired thickness it is time to cut them to length and layout your board construction. To make an end grain cutting board you do not need many materials. The 3D effect comes from the colors of the wood species I used.
Using a miter saw crosscut the board into two equal pieces and square up the ends. And again dont forget to wipe off any excess glue with a wet rag. By Marc Spagnuolo 190MarApril 2007 Issue Mark Spagnuolo In this excerpt from The Wood Whisperer video podcast woodworker Marc Spagnuolo walks viewers through the process of making an end-grain cutting board from maple and purple heart.
Assembling and Gluing the Cutting Board Use the drum sander to sand the strips. Ask Question Step 4. So to start rotate the boards so that the end grain is facing sideways.
The best to get to spice up your chopping kitchen routines. Smaller pieces have more seams. Adhere the pieces together using strong glue and give it a wood finish that will be suitable for food too.
-- End Grain Cutting Board Maple And Walnut Youtube Clamp the assembled strips into two panels. Use the same gluing technique as in Step 5 to make a single panel and glue a sacrificial 2x to each end. Rotate each strip 90 degree end grain up.
Note that every slice has to be the same size at the end of the day. Comfortable finger grooves 6 wide for easy pickup and moving also allowing both sides. On the thickness side of things your cutting board should not be more than 1-2 inches.
For a regular end grain cutting board you will need ¾ dense hardwood with close grain. Crafted with Black Walnut Hickory and Purple Heart hardwoods. I took walnut sapele cherry and maple and mixed them together to give the illusion of a 3D weave pattern.
The boards and 2 clamps on the end grain are only there to keep the boards from sliding around and curing crooked. Ask Question Step 6. HttpslddynostihThis weeks woodworking build video is a 3d End Grain Cutting Board with a very unique tessel.
Without this your final board will not be level. Since the cutting board is end grain its rock solid and pretty thick. You will remove the excess at the drum sander later.

Pin On Carlstuff

Pin En Carlstuff

Pin On Projects To Try

Pin On Butcher Blocks

Pin On Woodwork I Would Like To Do

Pin On Woodworking

Pin On Woodworking Projects

Pin On Work

Pin Na Doske Fun Food Pics Videos
Tabla De Picar 3d De Nogal Youtube Madera

Pin On Workshop

Pin On Trees

Pin On Cutting Board
Pin On Cutting Board

Pin On Quick Saves

Pin On Cutting Boards

Pin Na Doske Cutting Boards

Pin On Woodworking

Pin On Cutting Boards